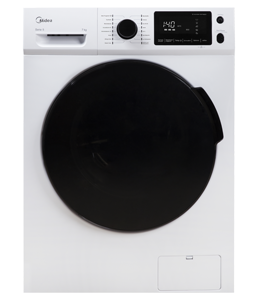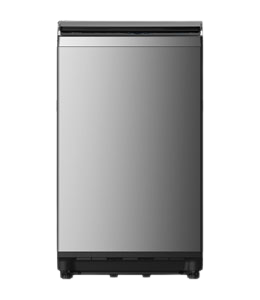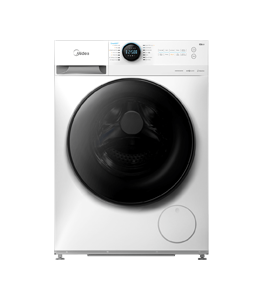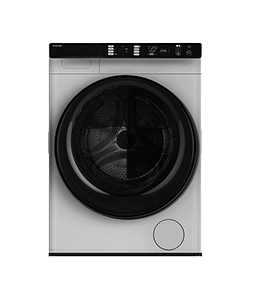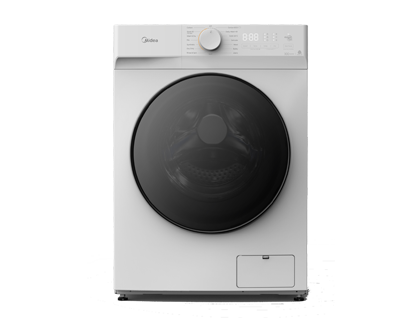
Midea MF200W70B/E Freestanding Washing Machine
read more

This guide will help you get started, for full details, please refer to the instruction manual.
Compare the parts in the package with the parts written in the manual are the same, and reject any package breakage or missing parts if any. A front-load washing machine usually contains the following parts.
 | 01 Release lever 02 Detergent drawer 03 Control panel 04 Door 05 Drum 06 Debris filter 07 Emergency drain tube 08 Filter cover 09 Worktop 10 Power plug 11 Drain hose 12 Levelling feet |
 | Spanner |
 | Bolt caps |
 | Hose guide |
 | Cold water hose |
NOTE
Spanner is needed for adjusting the levelling feet, and removing the transit bolts on the back of the washing machine.
4 bolt caps are provided for covering the transit bolt holes.
Use the hose guide to loop the end of the drain hose.
Connect the cold and hot water hoses to the inlets at the back of the washing machine to supply cold and hot water.
Some types may just have one feed water inlet which is for cold water. If your washing machine has one water supply inlet, make sure you connect the cold water hose to the cold water tap.
Electrical supply and grounding
AC220-240V/50Hz fuse or circuit breaker is required
Use an individual branch circuit specific to the washing machine
To ensure proper grounding, the washing machine is attached with a bonus power cord featuring a three-prong grounding plug for use in a properly installed and grounded outlet.
Check with a qualified electrician or serviceperson if you are not sure about the grounding.
Water supply
A proper water pressure for washing machine is between 50 kPa and 1000 kPa. Water pressure less than 50kPa may cause the water valve not to close completely or it may take longer to fill the drum, causing the washing machine turn off. The faucet must be within 120 cm from the rear of the contraction so that the provided inlet hoses can reach the washing machine.
Tips: CAUTION
Check all connections at the water valve and taps for any leaks before using the washing machine for the first time. Turn off the taps when the washing machine is not in use.
Drain
A standpipe in height of 60-90cm is recommended. The drain hose must be connected through the hose clip to the standpipe, and the standpipe must fully cover the drain hose.
Flooring
For best performance, the washing machine must be installed on a solid floor. Wood floors may need to be reinforced to minimize vibration and/or unbalanced loads. Carpeting and soft tile surfaces are not a good resistance to vibrations and may cause the washing machine to move slightly during the spin cycle.
Installation CAUTION
Do NOT install the washing machine on a platform or a poorly supported structure.
Water temperature
Do not install the washing machine in areas where water may freeze as the washing machine always retains some water in its water valves, pumps, and/or hoses. Frozen water left in the connection parts may cause damage to belts, the pump, and other components of the washing machine.
Minimum clearance for stable operation
Sides | 25mm | Rear | 50mm |
Top | 25mm | Front | 550mm |
If both the washing machine and a dryer is installed in the same location, a ventage at least 550mm in diameter is needed at the front of the alcove or closet. Your washing machine alone does not require a specific air opening.
STEP 1 Select a location
Location requirements:
Solid, level surface without carpeting or flooring that may obstruct ventilation
Away from direct sunlight
Adequate room for ventilation and wiring
The ambient temperature is always higher than the freezing point (0 °C)
Away from a heat source
STEP 2 Remove the transit bolts
Unpack the product package and remove all transit bolts.
NOTE: The number of transit bolts may differ depending on the model.

Locate the transit bolts (marked with circle in the figure) on the rear side of the washing machine.
CAUTION
Do not remove the screw (A) that fixes the hose clip
Using the supplied spanner, loosen all the transit bolts by turning them counterclockwise.

Insert the bolt caps (B) to the holes (marked with circle in the figure).

STEP 3 Adjust the levelling feet
Gently slide the washing machine into position. Excessive force may damage the levelling feet.

Level the washing machine by manually adjusting the levelling feet.

When levelling is complete, tighten the nuts using the spanner.

STEP 4 Connect the water hose
The provided water hose may differ depending on the model. Please follow the instruction according to the provided water hose.
Connecting to a threaded water tap
Connect the water hose to the water tap, and then turn the connector clockwise as shown.

Connect the other end of the water hose to the inlet valve on the back of the washing machine. Turn the hose clockwise to tighten.

Open the water tap and check if there are any leaks around the connection areas. If there are water leaks, repeat the steps above.

Be sure to make sure that all areas do not leak, otherwise there may be a risk of electric shock.
CAUTION
Do not stretch the water hose by force. If the hose is too short, replace the hose with a longer, high-pressure hose.
Connecting to a non-threaded water tap
Remove the adaptor (A) from the water hose (B).

Use a Phillips screwdriver to loosen four screws on the adaptor.

Hold the adaptor and turn part (C) in the arrow direction to loosen it by 5 mm (*).

Insert the adaptor onto the water tap, and then tighten the screws while lifting the adaptor.
Turn part (C) in the arrow direction to tighten it.

While pulling down part (D) on the water hose, connect the water hose to the adaptor. Then, release part (D). The hose fits into the adaptor with a clicking sound.

To complete connecting the water hose, see 2 and 3 on the “Connecting to a threaded water tap” section.
NOTE
After connecting the water hose to the adaptor, check if it is connected properly by pulling the water hose downwards.
Use a popular type of water taps. If the tap is square-shaped or too big, remove the spacer ring before inserting the tap into the adaptor.
For models with an additional hot water inlet:
1. Connect the red end of the hot water hose to the hot water inlet on the back of the machine.
2. Connect the other end of the hot water hose to the hot water tap.

Aqua hose (applicable models only)
STEP 5 Position the drain hose
The drain hose can be positioned in three ways:
Over the edge of a wash basin
The drain hose must be placed at a height of between 60 cm and 90 cm (*) from the floor. To keep the spout of the drain hose bent, use the supplied plastic hose guide (A). Secure the guide to the wall using a hook to ensure stable drainage.

In a drain pipe
The drain pipe should be between 60 cm and 90 cm high (*). It is advisable to use a 65 cm high vertical pipe.
To ensure the drain hose stays in position, use the plastic hose guide provided (see the figure).
To prevent the siphoning of water flow during drainage, make sure to insert the drain hose 15 cm in the drain pipe.
To prevent the drain hose from moving around, secure the hose guide to the wall.
Drain standpipe requirements:
Minimum diameter of 5 cm
Minimum carry-away capacity of 60 litres per minute

In a sink drain pipe branch
The drain pipe branch mush be above the sink siphone so that the end of the hose is at least 24 in. (60 cm) above the ground. (*) : 24 in. (60 cm)
CAUTION
Remove the lid on the sink drain pipe branch before connecting the drain pipe to it.

CAUTION
Do not put the drain hose in places of stagnant water or ponding. The water may flow back to the washing machine.

STEP 6 Power on
Plug the power cord into a wall socket featuring an AC 220-240 V / 50 Hz approved electrical outlet protected by a fuse or circuit breaker. Then, press Power to turn on the washing machine
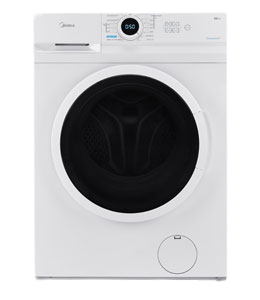
This guide will help you get started. Please refer to the instruction manual for full details.
What's in the box?
Owner's manual
Water supply hoses x2
Water intake cap
Quick connection adaptor
Bottom cover
Screws
Important: Before installing, please make sure there are rubber gaskets inside the fittings at both ends of the water supply hoses. Missing rubber gaskets can cause water leakage.
Install the Bottom Cover
Slide the bottom cover into the slots on bottom surface of the unit as shown in the following figure. Fix it with two screws attached with the unit.

Connect the water hose
Connect the ends of the water supply hoses to the HOT and COLD faucets. Use the Quick Connection Adaptor for connection to the COLD water faucet.
Connect the ends of the water supply hoses to the water supply inlet connections at the back of the washer.
Turn on the HOT and COLD water supplies and check all the water supply intake connections and the faucets for water leaks.
Connect the drain hose
The drain hose can be positioned in three different ways:

Over the edge of a wash basin

In a standpipe

In a laundry tub
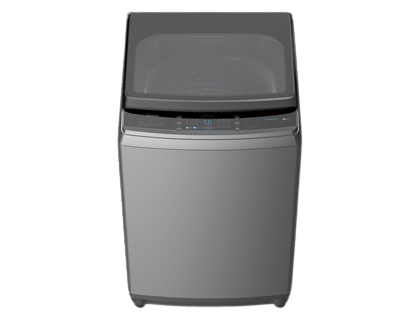
Leveling your washer
See if the washer is level by checking the position of the tub or using a leveling gauge.
Slide the washer into position.
Open the lid of the washer, and pour water into the tub to just below the pulsator level.
If the washer is level, the pulsator is positioned at the center of the washer as shown in the figure above right. If not, level your washer by turning the front leveling feet clockwise or counterclockwise as necessary

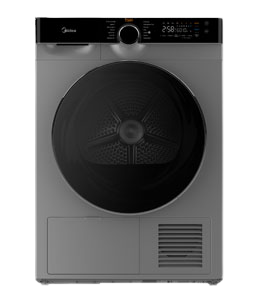
When you buy a new dryer, you need to consider its installation. Usually, the company you bought the dryer will install it for you, but when you've purchased a used dryer or you don't want to pay for the service, you can install it yourself using the following guidelines.
1.Check the voltage on the dryer
Many new dryers on the market today use 120 volts, so check your circuit breaker to make sure you have two 120 volt circuits. If you don't know how to check, ask a qualified electrician to help you check your circuit breaker.
2. Make sure you have a dryer-compatible exhaust vent on the wall
The vents on the dryer need to match the vents on the wall of the laundry room. Most vents are 4 inches (10.16 cm) in diameter. If the vent on the dryer does not match the vent on the wall, you can purchase a vent adapter or transition tube at a hardware shop or home improvement shop.
3. check the gas pipes in the laundry room
If you are choosing a gas dryer. Then a gas dryer requires a proper gas connection. The gas line should have a supply valve in the room where you intend to install the dryer, preferably within 6 feet (1.8 m) of the appliance. If you do not already have a gas line in your laundry room, you will need to have a qualified technician help you with the installation.
1.Turn off the circuit breaker and gas valve
You can turn off the circuit breaker at the main breaker panel. They are usually located in garages or basement houses and in utility closets or bedrooms in flats and condominiums. The gas valve can be turned off at the supply valve of the dryer gas line or at the main gas service shut-off valve. If you do not know how to turn off the circuit breaker and or gas valve, seek the help of a professional skilled worker to assist you.
2.Apply the thread compound to the threaded end of the tube
You will need to apply pipe thread compound to all threaded connections before connecting the pipe from the dryer to the gas pipe in the wall. This is very important. It will help to create a good seal between the pipe components and prevent dangerous gas leaks.
3.Connecting pipe connectors
Attach the flexible connector with stainless steel fittings to the gas pipe of the dryer. You can usually find it in the packaging of the dryer you buy. But you need to make sure that your connector is long enough to connect the dryer to the wall duct. And don't try to re-use old pipe connectors.
4.Connecting the dryer to the wall pipe
After connecting the pipe connector to the pipe on the dryer, connect the other end to the gas pipe in the wall. This gas pipe should have a threaded valve assembly attached. You will connect the pipe connector to the valve assembly.
5.Secure all connections
Use a pair of adjustable spanners to tighten all connections between the gas line components. However, do not over-tighten and tighten the pipes or strip the threads.
6.Check for gas leaks
You can use a detergent solution to check for gas leaks. Apply the detergent solution to the connectors between the various gas tube assemblies. Then, open the gas at the dryer supply valve. If you see bubbles forming on the connectors, this means you have a leak in the gas line. At this point, turn off the gas immediately, carefully tighten the connections and retry until the installation is complete.
1.Connecting the exhaust hose
There are two types of ventilation systems, rigid ventilation, which consists of a rigid metal pipe that works up to 40 feet (12.2 m), and semi-rigid ventilation, which uses a flexible hose that works up to 20 feet (6.1 m). Generally speaking, rigid ventilation systems are suitable for installation in dryer vents on the floor, while semi-rigid ventilation hose systems are suitable for connection to vents above the floor.
2.Secure the vent with a hose clamp
You can use hose clamps, pipe tape, or aluminum foil tape to ensure a secure connection between the ends of the exhaust hose. Generally speaking, hose clamps are the safest option as the tape will eventually dry out and lose its adhesive properties.
3.Check your external pipe openings
Ensure that the external duct openings are free of lint and other blockages and that the ventilation hood remains in place.
1.Connecting the power cable
You will need an adapted strain relief and install it at the power cable through-hole to prevent damage to the power cable.
2.Move the dryer to its final position
A distance of a few feet should be left between the dryer and the wall. You also need to be careful that the temperature in this location is not too low, as this can inhibit the function of the dryer. If you are using flexible or semi-rigid exhaust hoses, take special care not to squeeze them.
3.Adjustment of the dryer
You need to check the four corners of the dryer and place it at a horizontal angle. If necessary, adjust the length of the dryer legs so that they are perfectly horizontal.
Then turn the circuit breaker and gas back on. Now you are ready to use your dryer.
The installation of a washing machine and dryer involves plumbing knowledge, electrical knowledge, and carpentry skills. Washing machines require an electrical outlet, a supply of hot and cold water, and a drainage outlet. Dryers also require electricity, with electric dryers requiring a 240-volt socket and gas dryers requiring plumbing for a gas supply. In addition, the dryer will need an exhaust outlet. Next, we will provide you with some guidance to help you better complete your washer and dryer installation.
Make sure you have a 120-volt electrical outlet near your washer and dryer and confirm that the outlet is ground fault protected. If not, you will need to convert the existing outlet to a GFCI and you will also have to change the circuit breakers to match the appliance's current specifications. In addition, an electric dryer requires a 240-volt outlet controlled by a pair of dedicated 30 to 50 amp circuit breakers, depending on the dryer's specifications. If you don't have sufficient experience with electricity you're better off seeking a professional electrician to install a 240-volt dryer circuit for you.
It is best to keep your washing machine close to the water heater as you can tap into the water heater's cold and hot water supply from its inlet and outlet lines. If the distance between the washing machine and the water heater is long, then you can use the nearest 3/4" hot and cold line. Connect with a 3/4" by 1/2" tee fitting and run these lines to the wall behind the washing machine. Each line terminates with a shut-off valve, securely attached to the wall frame above the top of the washing machine for easy access. A plumber usually terminates the supply line with a washing machine box. It contains the valve and also has an opening for the installation of a vertical pipe.
The drain for the washing machine is known as a standpipe and is usually constructed from a 2" ABS pipe. The opening of the standpipe should be above the overflow level of the washing machine and at least 34 inches above the floor. It drains into a P-trap which in turn drains into a convenient waste pipe. Washing machines and sinks or toilets usually share a standard drain. the P-trap must discharge within 5 feet of the trap. A plumber usually runs a vertical pipe from the horizontal trap outlet to connect it to an existing vent.
The installation of 1/2" galvanized or black iron gas pipes for gas dryers is another important task that needs to be completed and this is usually carried out by a professional. This is because this task is dangerous and could potentially cause a fire if things go wrong. In addition, installing dryer vents requires some carpentry skills. Because the vent needs to go out of the side or roof of the house, you will need to cut a hole for it and seal the gap after the vent has been installed. Dryer manufacturers will generally recommend that you use smooth metal ducting. And you can make the maximum length of the vent included in the dryer specifications, although 25 feet is the standard maximum length for a vent without a bend.
Moving a washer and dryer to the other side of the same wall is not very difficult, but the operation requires some plumbing and electrical knowledge and involves opening the plumbing in an adjacent room to connect appliances. To do this, you have to break the drywall, flip the connections, and fix the wall before installing the washer and dryer. Or you can go directly to help with electricity and gas work.
You can ask a professional moving company to help you with this operation. The cost is usually cheaper than moving the washer and dryer upstairs. Moving into a basement also often brings the washer and dryer closer to water pipes and drainpipes that can be utilized or tapped. But you will need to install an outside vent as well as electrical connections.
Moving the washer and dryer to the garage can save your living space. The garage floor is concrete, which is also perfect for appliances such as a washer and dryer. But installing a washer and dryer in a garage also requires plenty of space and requires you to choose a suitable location for them.
Moving a laundry room from the basement to the main floor is one of the most common home improvement projects. Not only is this a great way to increase the value of your home, it's also an easy way to add space to your home. But before installation, you need to carefully consider issues such as noise, cost, space and safety.